Friday 30 December 2016

How to extend concurrent RD connections - Windows Server 2012

How to extend the number of concurrent RD connections in Windows Server 2012

As we understand that only 2 concurrent remote desktop connection is allowed on a server, below procedure will allow you to extend the concurrent connection from 2 to many.

To allow multiple users connecting Remote Desktop to one server you need to enable an RD Session Host server. For this, you must first install the RDS role on the Windows server from Server Manager. Then install the RD Session Host Role Service. As you go through the installation, you’ll have to:
  * Choose whether to require Network Level Authentication (NLA) for logons. NLA enables user authentication before creating a full session on the RD Session Host server. This provides both faster logon and protection from intentional connection storms that could lead to a Denial of Service (DoS).
< * Add the user groups you wish to allow access to the RD Session Host server on the Remote Desktop Users group on the server.
< * Configure user experience options by allowing (or disabling) audio and video playback, audio recording and Desktop Composition (enabling Desktop Composition enables Aero features).
< * Specify a license mode for the server. Each user or device needs a license to connect to an RD Session Host server. Choose licensing Per User or Per Device for these connections. You don’t have to set up a license server right away because there is a grace period.


Remote Desktop Services provides a licensing grace period for the RD Session Host server during which no license server is required. During this grace period (for Windows Server 2012, Grace period is 120 Days), an RD Session Host server can accept connections from unlicensed clients without contacting a license server. The grace period begins the first time the RD Session Host server accepts a client connection. The grace period ends after whichever of the following occurs first:
< * A permanent RDS CAL is issued by a license server to a client connecting to the RD Session Host server.
< * The number of days in the grace period is exceeded.


To check grace period balance, you can run tlsbln.exe in the command prompt of the server you are trying to give remote desktop connection.

Enable JavaScript in Windows

Enable JavaScript in Windows Internet Explorer

This is very much required to run several accessment tools; like to run RAP Tools successfully we require this to be enabled too.
To allow all websites within the Internet zone to run scripts within Internet Explorer:
  1. On the web browser menu, click Tools or the "Tools" icon (which looks like a gear), and select Internet Options.
  2. When the "Internet Options" window opens, select the Security tab.
  3. On the "Security" tab, make sure the Internet zone is selected, and then click on the "Custom level..." button.
  4. In the Security Settings – Internet Zone dialog box, click Enable for Active Scripting in the Scripting section.
  5. When the "Warning!" window opens and asks, "Are you sure you want to change the settings for this zone?" select Yes.
  6. Click OK at the bottom of the Internet Options window to close the dialog. 
  7. Click the Refresh button to refresh the page and run scripts.
To allow scripting on a specific website, while leaving scripting disabled in the Internet zone, add the specific Web site to the Trusted sites zone:

  1. On the web browser menu, click Tools, or the "Tools" icon (which looks like a gear) and select Internet Options.
  2. When the "Internet Options" window opens, select the Security tab.
  3. On the "Security" tab, select the Trusted sites zone and then click the Sites button.
  4. For the website(s) you would like to allow scripting, enter the address within the Add this website to the zone text box and click Add. Note: If the address does not begin with "https:", you many need to uncheck "Require server verification (https:) for all sites in this zone".
  5. Click Close and then click OK at the bottom of the Internet Options window to close the dialog.
  6. Click the Refresh button to refresh the page and run scripts.

Create a Bootable USB Flash Drive/ Pendrive

Create a Bootable USB Flash Drive

You can create a bootable USB flash drive to use to deploy Windows OS. The first step is to prepare the USB flash drive by using DiskPart, which is a command-line utility. For information about DiskPart, see DiskPart Command-Line Options.

To create a bootable USB flash drive

  1. Insert a USB flash drive into a running computer.
  2. Open a Command Prompt window as an administrator.
  3. Type diskpart.
  4. In the new command line window that opens, to determine the USB flash drive number or drive letter, at the command prompt, type list disk, and then click ENTER. The list disk command displays all the disks on the computer. Note the drive number or drive letter of the USB flash drive.
  5. At the command prompt, type select disk <X>, where X is the drive number or drive letter of the USB flash drive, and then click ENTER.
  6. Type clean, and the click ENTER. This command deletes all data from the USB flash drive.
  7. To create a new primary partition on the USB flash drive, type create part pri, and then click ENTER.
  8. To select the partition that you just created, type select part 1, and then click ENTER.
  9. To format the partition, type format fs=ntfs quick, and then click ENTER.
  10. Type active, and then click ENTER.
  11. Type exit, and then click ENTER.
  12. When you finish preparing your custom image, save it to the root of the USB flash drive.

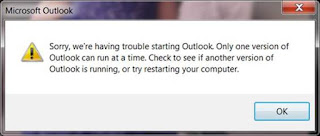
Outlook crashes with error message "Only one version of Outlook can run at a time"


Check if multiple process of Outlook.exe is running in the task manager.
· Press Ctrl+Alt+Del, and then chose Task Manager.
· Under processes tab look for Outlook.
· If you find the Outlook process running, right click on it and end the process.
If you do not see multiple process running in the background, then try opening Outlook in safe mode and check the result:
·         Hold Windows key + R.
·         Copy and paste, or type the following command in the Open box, and then press Enter:
Outlook /safe
Note: There is space between Outlook and /.

Shared Sent visibility

Exchange’s shared mailbox won’t save your sent or deleted Items in its mailbox owner

You must add a DWORD = 1 value or update any value it already exists for the sent mails to go to its respective mailbox.


HKEY_CURRENT_USER\Software\Microsoft\Office\version]\Outlook\Preferences\DelegateSentItemsStyle