Showing posts with label IT» Systems and Infrastructure. Show all posts

Monday 16 December 2019

Creating a CSR and Installing and configuring your SSL


Step 1:Creating a CSR 


Step 2: Install and Configure Your SSL Certificate in IIS 8 or IIS 8.5 on Windows Server 2012 


Detailed Steps are provided at the Certificate Authority site. refer here

Quick Shortcut in Windows 10 - Recording sessions

Windows key + shift-S

You can also use keyboard shortcut Windows key + shift-S to capture a screenshot with Snip & Sketch. Your screen will dim and you'll see Snip & Sketch's small menu at the top of your screen that will let you choose with type of screenshot you want to capture.

Alt + Print Screen

To take a quick screenshot of the active window, use the keyboard shortcut Alt + PrtScn. This will snap your currently active window and copy the screenshot to the clipboard. You'll need to open the shot in an image editor to save it.

PSR.exe to record steps to reproduce a problem

To Check FSMO Roles from DC

Flexible Single Master Operations specialized domain controller roles, how to check if you have multiple DCs - a quick glimpse

From command prompt:
netdom query fsmo

C:\Windows\system32>netdom query fsmo
Schema master                ****01P.ABCD.COM
Domain naming master  ***02P.ABCD.COM
PDC                                    ***01P.ABCD.COM
RID pool manager            ***01P.ABCD.COM
Infrastructure master        ***01P.ABCD.COM
The command completed successfully.

Sync all Domain Controllers

Using Command Prompt from DC:

repadmin /syncall /APeD

------------------------------------------------------------------------------------------
The flags in the following list are supported.
• /a Aborts, if any server is unavailable.
• /A Synchronizes all naming contexts that are held on the home server.
• /d Identifies servers by distinguished name in messages.
• /e Synchronizes domain controllers across all sites in the enterprise. By default, this command does not synchronize domain controllers in other sites.
• /h Displays Help.
• /i Iterates indefinitely.
• /I Runs the repadmin /showrepl command on each server pair in the path instead of synchronizing.
• /j Synchronizes adjacent servers only.
• /p Pauses after every message to allow the user to abort the command.
• /P Pushes changes outward from the specified domain controller.
• /q Runs in quiet mode, which suppresses call back messages.
• /Q Runs in very quiet mode, which reports fatal errors only.
• /s Does not synchronize.
• /S Skips the initial server response check.


--------------------------

Replication summary:

repadmin /replsum

To check to which Domain Controller the end nodes are connected

From command prompt type:
Set l

Output>> 
C:\Users\Rinith >set l
LOCALAPPDATA=C:\Users\Rinith\AppData\Local
LOGONSERVER=\\HQABCD

Check Operational Group Policy from DC:
From Event Viewer
>>Applications and Services Logs >> Microsoft >> Windows > GroupPolicy >> Operational >> Filter Event ID 5310

Result:
Account details:
            Account Name : CN=**01P,OU=Domain Controllers,DC=ABCD,DC=COM
            Account Domain Name : ABCD.COM
            DC Name : \\**01P.ABCD.COM
            DC Domain Name : ABCD.COM

Resolution: Windows 10 Hello - Group Policy PIN and fingerprint gray out

Requirement:

Allow user to logon with PIN or Fingerprint via Group Policies

Resolution:

Create GPO


 Some of the commands to troubleshoot in case policies won’t replicate to the end nodes:

Logon to DC and open Active Directory PowerShell Module as administrator and execute below commands and compress the output folder c:\Ms-log and send by mail:

Cd \

md MS-log

Get-ADDomain | fl Name, DomainMode > C:\ms-log\DFL.txt

Get-ADForest | fl Name, ForestMode > C:\ms-log\FFL.txt
 
Get-ADDomainController -Filter * | select Name, OperatingSystem, IPv4Address, Site > C:\ms-log\dclist.txt

Netdom query fsmo > C:\ms-log\fsmo.txt

Repadmin /showrepl * /csv > C:\ms-log\showrepl.csv

Gpresult /h C:\ms-log\GPR001.html

auditpol.exe /get /category:*  >  C:\ms-log\audit.txt

dfsrmig.exe /getglobalstate > c:\MS-Log\dfs.txt 

logon to client open CMD as admin and execute below

gpresult /h c:\gpr-client.html  


For more information:

https://www.tenforums.com/tutorials/107441-enable-disable-users-sign-windows-10-using-biometrics.html

Thursday 25 April 2019

Sysprep before converting it to Template

How to prepare a VM with Sysprep before converting it to Template
During VM deployment I saw it many times where people don’t run VM customization wizard during deployment and later faces duplicate SID issues, hence we need to prepare a VM with Sysprep.
To ensure not to face duplicate SID issue, its better to prepare the OS using Sysprep before converting the VM to Template.
Prior to converting a VM to Template, just remember to use Sysprep as follows,
Run Sysprep, c:\Windows\System32\Sysprep\sysprep.exe
Ensure ‘System Out-of-Box Experience (OOBE)’ is selected and Tick the ‘Generalize’ option and Select ‘Shutdown’ from the Shutdown Options.

(You can do the same in one go using this command “C:\Windows\System32\sysprep\sysprep /oobe /generalize /shutdown”)
Once the machine has shutdown, convert it to Template/Image or Clone and you are good to go!
This will trigger sysprep process inside newly deployed VM after its first Power On.
Note: Yes during VM deployment, Sysprep will come to the picture right at the VM deployment phase where you have 3 options:
1. Do not customize
2. Customize using the Customization Wizard
3. Customize using an existing customization specification
If you had already prepared the template VM with Sysprep the you can choose Do not customize here.


Monday 15 October 2018

Remotely lock a computer and restrict them from logging back in

For investigative purpose, sometimes you have to freeze a terminal by throwing someone off a terminal, but at the same time preserve the evidence on the terminal. Let’s assume that if someone is using a terminal to send frustrating messages to their colleagues or having obscene chats or even an anonymous trying to hack, and you need to secure the running terminals to capture the commands that has been run.
Following process demonstrates that it is quite simple to accomplish such simple investigative task, provided you have admin privilege over the network:
  1. It is mandatory to change the target account’s AD password. This ensures the culprit is deprived from logging back in
  2. If you don’t have psexec, download the PSTools and extract the content and then target the terminal with psexec and use rundll32 to execute user32.dll with the LockWorkStation function. This will trigger the account lock. The following command can be tweaked for your purposes: H:\PSTools>PsExec.exe \\192.168.100.10 -d -u ventej\Administrator -i cmd /c "rundll32 user32.dll, LockWorkStation"
  3. Now it’s time to seize the terminal. Make sure you are standing by ready for this, as the victim could be distressed and shut down his workstation, essentially removing evidence.
Good Luck!

Wednesday 3 October 2018

Check Which Domain Controller You Are Connected To

From Command Prompt Type "set l". Review the info next to the LOGONSERVER field to see the name of the domain controller.
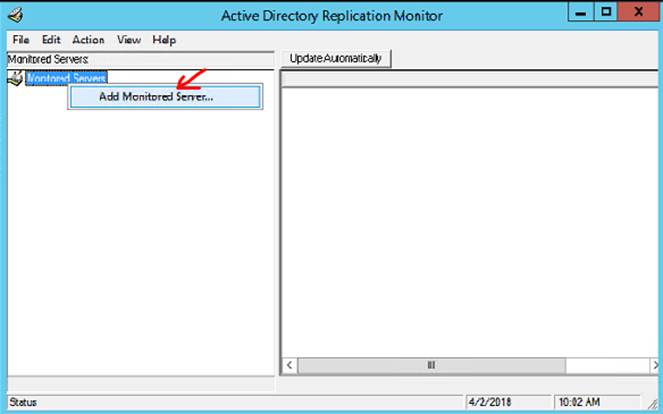
 
Using Nltest Command, Type "nltest /dsgetdc:[FQDN]" (without quotation marks) into the console. Review the information next to the DC field to see the name of the domain controller with which the computer or system is communicating


Thursday 28 June 2018

Quick Activation of Server 2016 via Command Line

Having problems activating Windows Server 2016, (or previous versions Windows 8, or Server 2012) one of these three solutions below should get you through:
1.    Command Line to launch activation GUI:
This is handy if the GUI won’t start and you want to skip some steps to get it to work.
  1. Click START – type RUN
  2. Type slui 3 and press ENTER
    1. yes, SLUI: which stands for SOFTWARE LICENSING USER INTERFACE
      1. SLUI 1 brings up the activation status window
      2. SLUI 2 brings up the activation window
      3. SLUI 3 brings up the CHANGE PRODUCT KEY window
      4. SLUI 4 brings up the CALL MICROSOFT & MANUALLY ACTIVATE window
  3. Type in your product key

     2.     To Activate Windows via Command Line:
   
 1.  Launch a CMD as an Administrator
 2.   Type: slmgr.vbs /ipk xxxxx-xxxxx-xxxxx-xxxxx-xxxxx
 3.   Press Enter
If your key is valid and you are connected to the internet, it should activate within a second or two.


 3.     If above steps points failure, then call Microsoft Activation Center; direct support line at 1 800-936-4900
 

Desktop Wallpaper Group Policy doesn't work for Win 10 clients: workaround

 
Windows 10 does funky things with wallpapers. It likes to make a cached copy in  %appdata%\roaming\microsoft\windows\themes\cachedfiles
and it will sometimes make a copy under  %AppData%\roaming\Microsoft\Windows\Themes\TranscodedWallpaper.jpg as well.
 
There is different behavior on Windows 7 and Windows 10 on desktop wallpaper. In Windows 7, when we log into the system, the cached wallpaper file will re-generated automatically.

But in Windows 10, if the wallpaper path didn’t change, the cached wallpaper will not re-generate.

After I deleted below file and log off/log on I can see the desktop wallpaper automatically changed on Windows 10.
 
%USERPROFILE%\AppData\Roaming\Microsoft\Windows\Themes\TranscodedWallpaper
So I applied this deletion operation to the domain controller as a log off  script, the script which is as below.
I created a .bat file and the content is:
del %USERPROFILE%\AppData\Roaming\Microsoft\Windows\Themes\TranscodedWallpaper


Replication to all domains

Replicate to all domains via command prompt:
repadmin /syncall /AePD

Quickly replicate to Azure AD via Azure ADConnect using PowerShell from Azure AD Connect server (if you have hybrid mode)
Start-ADSyncSyncCycle
  
via Replmon GUI:


Wednesday 14 June 2017

System Drive running out of disk space due to installer folder

Symptom: 
Environment :

Server 2012 R2.
Test Environment for application
Problem :
almost out of disk space (C Drive). Out of 60 GB only 3GB is left. This occurs after routine Microsoft patching cycle completes. After checking the folder size we noticed that Windows Installer hidden folder utilizes over 22GB of files and WinSxS utilizes over 8GB of files. Is it advised to move 'Installer' folder to another shared location and then create a shortcut to run "mklink /D C:\Windows\Installer D:\C_DRIVE\Windows\Installer" or is there any other alternative method we need to consider to clean up the disk space.
you need to resolve this issue

Cause: 
Normal behavior


Resolution:
Creating link path into installer folder is last option 
Note : Not recommended, nor supported deleting files from this directory.
Windows Installer Cache, located in c:\windows\installer folder, is used to store important files for applications installed using the Windows Installer technology and should not be deleted. If the installer cache has been compromised, you may not immediately see problems until you perform an action such as uninstall, repair, or update on a product.

More information : 

Windows/installer folder may contain Orphaned Patches, but the tricky job how to identify the registered or not patch.
During the research I have found a script might help us, please check :

From another side please apply this update on the system and reboot “update MSI.DLL :

Additionally, thought to share this with you if applicable. The value of the MaxPatchCacheSize under HKEY_LOCAL_MACHINE\Software\Policies\Microsoft\Windows\Installer policy is the maximum percentage of disk space that the installer can use for the cache of old files

More information :
and 

There is no limitation as to how many files that we could store in the windows folders. The content in the folder c:\windows\Installer are added by the msi based installations. When they are planning to install so many applications that would lay down 7000 files, they would want to consider the space and the other performance issues as well

Therefore last efforts if above did not resolve the issue :
 1. Increase C: volume size ( if possible) (recommended action).
 2.  Workaround : (prefer to apply on test environment within the installed application).

Copy using Windows explorer C:\Windows\Installer to another disk, e.g., D:\C_DRIVE\Windows\Installer
Make a backup copy of C:\Windows\Installer

Type the following commands in a cmd.exe window running as Administrator:
rmdir /s /q C:\Windows\Installer
mklink /D C:\Windows\Installer D:\C_DRIVE\Windows\Installer


Force Active Directory replication on a domain controller

Force Active Directory replication on a domain controller

In order to force Active Directory replication, issue the command 'repadmin /syncall /AeD' on the domain controller.  Run this command on the domain controller in which you wish to update the Active Directory database for.  For example if DC2 is out of Sync, run the command on DC2.

A = All Partitions
e = Enterprise (Cross Site)
D = Identify servers by distinguished name in messages.

By default this does a pull replication - which is how AD works by default.  If you want to do a push replication use the following command:

repadmin /syncall /APeD

P = Push

You want to do a push replication if you make changes on a DC and you want to replicate those changes to all other DC's.  For example, you make a change on DC1 and you want all other changes to get that change instantly, run repadmin /syncall /APeD on DC1.

Active Directory Replication Monitor (replmon) tool can be also used to sync across all domains
- synchronize each directory partition with all servers >> push mode and cross site boundaries.

note: gpupdate /force updates the group policies

Can't send an email message when Full Access permission is granted to a shared mailbox in Exchange Server

Can't send an email message when Full Access permission is granted
Sent on behalf email bounce back with message "This message could not be sent. Try sending the message again later, or contact your network administrator. You do not have the permission to send the message on behalf of the specified user. Error is [0x80070005-0x0004dc-0x000524]"
Solution:
Seems this has to undergo cleanup activity from Caching folder

Method 1
Configure the shared mailbox as an additional account. To do this, follow these steps:
  1. On the File menu, click Info.
  2. Click Account Settings, and then click Account Settings.
  3. Select your account, and then click Change.
  4. In the Change Account dialog box, click More Settings.
  5. On the Advanced tab, click Add.
  6. Enter the name of the mailbox, and then click OK.

    After you make this change, the additional mailbox is listed on the Advanced tab in the Microsoft Exchange dialog box.
  7. In the Microsoft Exchange dialog box, click OK.
  8. In the Change Account dialog box, click Next.
  9. Click Finish, and then click Close.
Method 2:
Caching Folder

follow steps 1 to 6 to get advanced tab and click outlook data file settings

Copy the cache patch (C:\Users\??enterloggedinusername\AppData\Local\Microsoft\Outlook\ and remove the .ost and also delete files from 'Offline Address Books' folder.
We were able to send message without any hassles after this corrective approach.